Mowing your lawn is an essential part of keeping it healthy and looking great throughout the growing season, but as fall progresses, you may start to wonder when it’s time to stop. The answer isn’t always cut and dry since factors like climate, grass type, and weather patterns all play a role.
Grass Growth as a Key Indicator
The best way to decide when to stop mowing is by observing your grass growth: – Cool-season grasses(e. g. , Kentucky bluegrass, fescue): These grasses often continue growing into late fall as temperatures cool down but stay above freezing.Warm-season grasses(e. g. , Bermuda grass, zoysia): These grasses typically start going dormant once nighttime temperatures consistently drop below 50°F (10°C).
If your lawn has slowed its growth considerably—where it takes more than two weeks for noticeable growth—you’re nearing the end of the mowing season.
Monitor Temperature Changes
- When average daytime temperatures dip below 50°F (10°C), warm-season grasses enter dormancy.
- Frost or freezing nights are clear indicators that grass will soon stop growing.
Tracking local weather forecasts can give you an idea of when cold conditions will halt growth in your area.
Optimal Lawn Height Before Dormancy
Maintaining the right height is crucial before your lawn enters its dormant phase: – For cool-season grasses, aim to trim them down to about 2½ – 3 inches before stopping. This helps prevent mold or disease from taking hold over winter.warm-season grasses, keep them around 1½ – 2 inches before storing away your mower.
Leaving grass too long can invite pests and fungal problems, while cutting it too short may stress the roots.
Avoid Mowing Wet or Frosted Grass
Late in the season, morning dew and frost are common. Avoid mowing if: – Grass blades are wet or slick from dew/frost. This can damage both the turf and your mower. – The soil is overly saturated after rain, as heavy equipment might create ruts or compact soil.
Waiting for sunny afternoons when conditions are drier ensures cleaner cuts and preserves lawn health.
A Quick Checklist for Determining When to Stop Mowing:
| Indicator | Action |
| Grass stops growing noticeably | Check growth every 7–10 days; stop mowing if no substantial change. |
| Nighttime temps below 50°F | Warm-season lawns likely entering dormancy; cool-season lawns slow down. |
| First frost | Begin preparing for final mow within a week or two after first frost. |
By paying attention to temperature trends, grass type, and growth rate, you’ll know exactly when it’s time to give both your zero-turn mower—and your lawn—a well-deserved rest until spring arrives.
As leaves begin to blanket your lawn and weather conditions shift, having the proper tools can make your mowing tasks easier and help maintain a healthy yard.
One of the most useful accessories for fall is a leaf collection system or bagger attachment. These systems attach directly to your mower, allowing you to vacuum up leaves as you cut grass.
– Time savings: Reduces the need for additional raking after mowing.
– Improved yard aesthetics: Keeps your lawn tidy by efficiently removing debris.
– Lawn health: Prevents thick layers of leaves from smothering grass.
If you prefer not to collect leaves but still want them off your lawn, a mulching kit is an excellent option. These kits typically include specialized blades and deck attachments that chop leaves into fine pieces as you mow, allowing them to decompose quickly into nutrient-rich mulch for your soil.
– Eco-friendly solution: Reduces waste by turning organic material back into fertilizer for your grass.
– Lower maintenance needs: No need to haul or dispose of collected leaves manually.
During fall, you may also find it useful to attach small trailers or carts to carry tools, soil amendments like fertilizer, or even firewood across your property. Look for durable tow-behind carts with sufficient capacity and easy tipping mechanisms for unloading materials efficiently.
Fall weather often brings damp ground conditions that may reduce traction on slopes or uneven terrain. Upgrading to all-terrain tires or adding tire chains can provide better grip during operation, preventing slippage and ensuring safety.
| Accessory Type | Purpose | Key Benefits |
| Leaf Collection System | Gathers fallen leaves while mowing | Saves time; keeps lawn clean |
| Mulching Kit | Shreds leaves into fine mulch | Improves soil health; eco-friendly |
| Tow-Behind Cart | Transports tools or materials | Increases convenience; saves effort |
| All-Terrain Tires/Chains | Enhances traction on wet ground | Improves safety and performance |
Weatherproof covers designed specifically for mowers shield them from rain and debris damage while extending their lifespan.
Diminished daylight hours in autumn mean that some homeowners may need to mow in low-light conditions either early in the morning or later in the evening after work. Installing headlights or an LED lighting kit ensures clearer visibility during these times, reducing risks such as running over hidden debris.
Should I Fertilize My Lawn in the Fall? If So, When Is the Best Time to Fertilize?
During this season, your lawn begins preparing for dormancy by slowing its growth above ground and focusing energy on strengthening its root system. Proper fertilization can support this process and help your grass survive the winter months while setting it up for vigorous growth in warmer weather.
Why Fertilize in the Fall?
Fall fertilization is essential because it: – Strengthens Root Growth: Nutrients applied in fall enhance root development, making your lawn more resilient to stressors like cold temperatures and snow.Replenishes Nutrients: Over summer, lawns often lose vital nutrients due to heat, mowing, and drought. Fall fertilization restores these nutrients.Improves Spring Green-Up: The residual nutrients left in the soil help grass grow thick and green once temperatures rise.Reduces Weed Growth: A healthier lawn is less susceptible to invasive weeds such as crabgrass in early spring.
When Is the Best Time to Fertilize?
Timing plays a critical role when fertilizing your lawn in autumn. Here are some guidelines: 1.After Temperatures Begin Cooling: Aim for late September through early November, depending on your region’s climate. The ideal window is when daytime temperatures consistently range between 50°F and 70°F. 2.Before Frost Arrives: Apply fertilizer well before the ground freezes to allow grass roots time to absorb nutrients. 3.Following Your Last Mow of the Season: A good rule of thumb is to fertilize after you’ve completed your final mow.
Check local weather conditions regularly and adjust accordingly for temperature fluctuations or unexpected frosts.
Choosing a Fall Fertilizer
Selecting an appropriate fertilizer blend is crucial for effective results: – Use a product labeled as a “fall fertilizer” or “winterizer. ” – Look for a mix with higher potassium (K) content (the third number on fertilizer bags) as potassium aids root development and cold tolerance. – A balanced amount of nitrogen (N) ensures that grass stores sufficient energy without promoting unnecessary top growth.
| Nutrient | Purpose in Fall Fertilization |
| Nitrogen (N) | Promotes storage of energy reserves |
| Phosphorus (P) | Boosts seedling establishment if reseeding |
| Potassium (K) | Enhances root strength and winter hardiness |
How to Apply Fall Fertilizer
Here are practical tips for applying fall fertilizer effectively: – Mow Beforehand: Ensure your lawn has been freshly mowed before application.Follow Manufacturer Guidelines: Use only as much fertilizer as recommended on the label; overapplication can harm your lawn or runoff into waterways.Use a Spreader for Even Distribution: Whether using a broadcast or drop spreader, apply evenly across all areas of your yard to avoid patchy growth.Water After Application: Light watering helps activate granules and allows nutrients to penetrate soil layers efficiently.
If you’re seeding any bare patches during fall, consider combining seeding with fertilization for optimal results.
By timing fertilization properly and understanding how it benefits your turfgrass during colder months, you’ll give your lawn every advantage heading into winter dormancy—and set yourself up for success next spring.
Can I mulch my leaves instead of raking
Mulching your leaves instead of raking is an excellent way to save time, reduce yard waste, and enrich your lawn with organic matter during the fall. If you own a zero-turn mower, this process becomes even more efficient due to its superior maneuverability and cutting precision. Here’s everything you need to know about mulching leaves with a zero-turn mower.
Benefits of Mulching Leaves
Mulching is not just a convenience; it also provides several benefits for your lawn and the environment: – Saves Time:Mulching eliminates the need for bagging or raking up large piles of leaves.Natural Fertilizer:The small, shredded leaf particles decompose quickly, adding essential nutrients back into the soil.Improves Soil Health:Organic matter from decomposed leaves enhances soil texture and promotes healthy microbial activity.Reduces Yard Waste:By mulching, you keep leaves out of landfills and reduce environmental impact.
How to Mulch Leaves with a Zero-Turn Mower
Using a zero-turn mower for mulching requires some preparation to ensure efficiency.
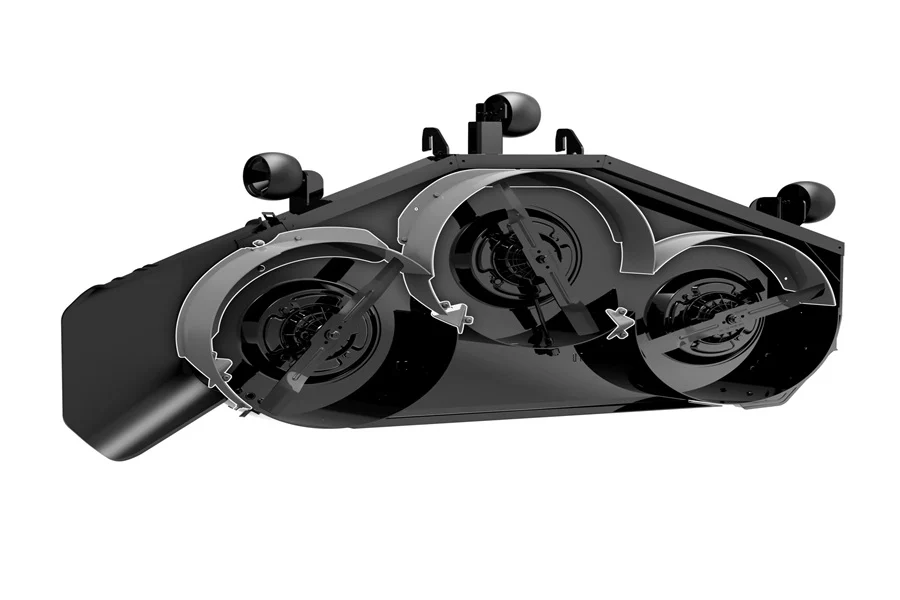
- Some zero-turn mowers come equipped with mulching blades or decks designed for this purpose. If yours doesn’t, consider purchasing a compatible mulching kit from your mower’s manufacturer.
- Mulching kits typically include blades that cut grass and leaves into finer pieces, as well as deck plugs that keep clippings circulating until they are fully shredded.
- Set your mower’s blades to an appropriate height—usually around 2. 5–3 inches—so that they can effectively shred both grass and leaves without scalping the turf.
- Avoid trying to mulch large piles of wet or compacted leaves all at once. Mow over thinner layers of leaves in multiple passes for consistent results.
- Wet leaves are heavier and harder to shred effectively, so choose a dry day for optimal results.
- Slightly overlap each pass with the mower to ensure even coverage and thorough shredding of all debris.
Best Practices for Effective Leaf Mulching
– Avoid mulching when there are excessive amounts of wet or heavy debris, as this may clog the deck. – Spread out leaf mulch evenly across your lawn rather than allowing it to accumulate in one area.
| Issue | Solution |
| Wet or damp leaves | Wait until conditions dry before mowing |
| Large piles of leaves | Mow in smaller layers with multiple passes |
| Dull blades | Sharpen or replace the blades |
When Should You Avoid Mulching?
While mulching offers many advantages, there are situations where it may not be ideal: – If your yard has thick accumulations of wet or compacted debris that could smother grass growth. – If you notice any signs of fungal disease on your lawn; excessive organic matter might worsen these conditions.
Below are several key steps to ensure your mower is ready for hibernation during the colder months.
Clean Your Mower Thoroughly
- Remove grass clippings and debris: Use a brush or air compressor to reach tight areas like under the deck, around blades, and near engine components.
- Wash surfaces: Hose down dirt on the exterior of the mower. Be cautious around electrical components and avoid excessive water pressure.
- Dry completely: Ensure all parts are thoroughly dry to prevent rust or corrosion over time.
Change or Drain Fuel
Gasoline left in your tank can go stale and damage engine components over the winter.
- Fill up your tank with fresh gas.
- Add a high-quality fuel stabilizer to prevent ethanol separation or varnish buildup.
- Run the engine for 5-10 minutes so stabilized fuel circulates through the system.
- If you prefer not to store gas in your mower, empty the tank completely and run the engine until all fuel is used up.
Service Oil, Filters, and Spark Plugs
- Change oil and oil filters: Old oil contains contaminants that can harm engine components if left sitting.
- Inspect or replace spark plugs: Clean fouled spark plugs with a wire brush or replace them outright if worn. Check manufacturer recommendations.
- Clean or replace air filters: A clogged air filter can reduce performance. Install a clean one so that it’s ready for spring.
Inspect Blades and Deck
- Sharpen blades: Dull blades negatively affect cutting efficiency come springtime.
- Remove rust from deck underside: Use a wire brush or rust remover if necessary.
- Apply protective coating (such as silicone spray) on metal surfaces prone to rust.
Tire Maintenance
| Tire Type | Recommended Storage Step |
| Pneumatic (air-filled) | Inflate tires according to manufacturer specs |
| Solid tires | No additional action required |
If possible, lift the mower slightly off its tires using jack stands or blocks to relieve pressure over prolonged periods.
Battery Care
- Disconnect battery terminals (negative first).
- Store batteries in a cool, dry place away from freezing temperatures.
- Use a trickle charger periodically throughout winter if applicable.
Store in an Appropriate Location
- Choose a clean, dry storage area such as a garage, shed, or covered structure.
- Avoid areas exposed directly to moisture or rodents—both can cause significant damage.
Consider using a weatherproof cover designed specifically for zero-turn mowers for an added layer of protection.
Each step ensures that this valuable piece of equipment remains dependable year after year while maximizing its performance capabilities over its lifetime.
Neglecting these steps can result in unnecessary wear and costly repairs. Below are detailed recommendations to safeguard your equipment during the off-season.
1.Clean Your Zero-Turn Mower
Cleaning your mower prevents debris, grass clippings, and dirt from causing damage over time.
- Remove caked-on debris from the underside of the cutting deck using a putty knife or deck scraper.
- Hose down the deck to clear any remaining buildup but allow it to dry thoroughly before storage.
- External Surfaces:
Wipe down handles, seats, and other exposed parts with a damp cloth. Removing dirt and grime minimizes rust formation. - Sharp blades can corrode faster if left dirty.
- Clean blades thoroughly and apply a light coat of oil or rust-preventative spray for protection.
2.Change the Oil and Filters
Old oil contains contaminants that can harm internal engine components during extended periods of inactivity.
- Drain old oil completely before replacing it with fresh oil suited for your mower’s specifications. Refer to the user manual for recommended grades.
- Replace the oil filter if your model includes one.
- Check and clean or replace air filters to ensure no obstructions impact airflow.
3.Inspect Belts, Cables, and Tires
Wear-and-tear on belts, cables, or tires can degrade further during storage if not addressed.
- Examine belts for cracks or fraying; replace them as needed.
- Lubricate cables to prevent stiffness caused by cold temperatures.
- Inflate tires to their recommended pressure level to avoid flat spots forming over winter months.
4.Add Fuel Stabilizer
Fuel left untreated over winter can degrade, leading to clogged carburetors and starting issues next season.
- Fill the gas tank about three-quarters full (this reduces condensation) and add fuel stabilizer according to package directions.
- Run the engine for a few minutes after adding stabilizer so it circulates throughout the system fully.
Alternatively:If you prefer not storing fuel in your machine at all, drain the gas tank completely instead of stabilizing it.
5.Disconnect or Remove Battery
Cold weather can drain batteries quickly if they remain connected during storage.
- Disconnect battery terminals (starting with the negative terminal) or remove the battery entirely.
- Store batteries in a cool but not freezing environment on a non-conductive surface like wood or plastic.
- Clean terminals with baking soda solution if buildup is noticeable, then dry thoroughly before storage.
6.Inspect Moving Parts & Grease Bearings
| Part | Action Required |
| Wheel Bearings | Apply high-quality grease |
| Spindles | Grease according to manufacturer specs |
| Pivot Points | Check movement; apply lubricant |
Pay close attention to areas specified in your owner’s manual that require regular maintenance lubrication.
7.Store Your Mower Properly
- Use a dry, sheltered area such as a garage or shed.
- Place blocks under wheels if stored on concrete surfaces long-term (to prevent tire cracking).
- Cover with a breathable tarp designed for outdoor equipment—not plastic—to prevent moisture buildup while allowing airflow.
Taking these steps ensures your mower stays in excellent condition throughout winter dormancy so it’s ready when fall gives way to spring lawn care demands again.
Neglecting these steps can lead to issues such as rust, fuel degradation, or engine problems. By following these guidelines, you can protect your investment and ensure it’s ready for the next mowing season.
1.Clean Your Mower Thoroughly
- Remove Grass Clippings: Use a brush or blower to remove grass clippings stuck under the deck or around moving parts. These clippings can retain moisture and cause rust or mold.
- Wash Exterior: Gently rinse the exterior with a garden hose, avoiding excessive water exposure near electrical components.
- Dry Completely: Ensure that all parts are thoroughly dry before moving on to other steps.
2.Inspect and Change Fluids
- Change the Oil: If you haven’t already done so recently, drain old oil and replace it with fresh oil specific to your machine’s requirements.
- Fuel Stabilizer: Add a fuel stabilizer to prevent gasoline from breaking down during storage. Run the engine briefly after adding it so the stabilizer circulates through the system.
- Drain Fuel (Optional): Alternatively, you may choose to completely drain the fuel tank if you’re concerned about long-term fuel degradation.
3.Check Filters
- Inspect the air filter for dirt or damage, and replace it if needed.
- Clean or replace any fuel filters as recommended by the manufacturer.
4.Blade Maintenance
- Remove blades and inspect them for wear or damage.
- Sharpen them now so they’re ready once spring arrives.
- Apply a light coat of oil to prevent rust on blade surfaces while in storage.
5.Battery Care
- Remove the battery from your mower if possible.
- Clean terminals with a wire brush and apply anti-corrosion grease.
- Store in a cool, dry place away from direct sunlight or freezing temperatures.
6.Tire Maintenance
- Inflate tires to their recommended pressure levels.
- Elevate rear wheels slightly off the ground if possible, using jack stands, especially if you’re storing on concrete surfaces.
| Maintenance Area | Recommended Action |
| Cleaning | Remove grass clippings; rinse exterior; dry well |
| Oil | Change oil |
| Fuel | Add stabilizer or drain tank |
| Filters | Check air and fuel filters |
| Blades | Sharpen blades; oil lightly |
| Battery | Remove; clean terminals; store properly |
| Tires | Check pressure; use jack stands when necessary |
7.Lubrication of Moving Parts
- Use manufacturer-recommended grease or oil on all pivot points and bearings.
8.Store in a Dry Location
- Choose a covered area such as a garage or shed where it will be protected from rain, snow, and extreme cold temperatures.
- Place a breathable cover over the machine to keep dust off while allowing ventilation.
By taking these steps now, you’ll avoid costly repairs later while ensuring smooth operation when it’s time to mow again next year. Create this habit every fall as part of maintaining both efficiency and lifespan for your zero-turn equipment.